I finished the refashion and now have a great button front cardigan with split cuff detail.
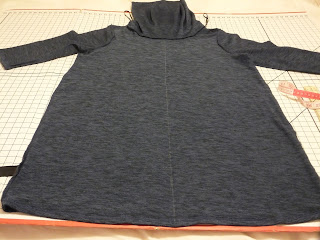
You may remember the original dress
First of all I measured the centre front and marked with a sliver of soap, and then cut up the centre front with shears.
Next I cut the collar off, leaving the original seam for stability.
I then smoothed the line from the centre front cut into the neckline cut using the french curve and replicated to the other side.
I didn't finish the cut edges at this point, but I did lay it carefully to one side and not handle it.
Next I took the collar and cut it into strips. I sewed 3 strips together to make the front band.
I applied very lightweight interfacing to the front band area, leaving the neck area of the band stretchy to go around the neckline.
Next I made buttonholes in one side of the front band (carefully checking placement against a RTW cardigan), applied fray check and allowed to dry. I then cut them open with a buttonhole chisel.
Then I sewed the front band onto the cardigan with a straight stitch, and zigzagged the seam together. (I thought serging would be too bulky). I then pressed the band and left it on the dummy.
The next day the area where the front band joined the front was still very wiggly where the zigzag stitching had stretched things out. It looked quite bad I thought, so I hovered the steam iron above the seam (on the wrong side) and pressed a bit more and eventually got a fairly flat front.
I then marked the button positions and sewed them on by hand with a tapestry needle so as not to split the fibres. As a happy coincidence I had some buttons exactly the right colour which had been saved from a button front skirt suit I made in the late 1990s! (Though I slightly question the wisdom of keeping buttons for 20 years but hey ho).


2 comments:
You did a great job on this cardigan! I'm always afraid to cut into sweaters.
This looks so awesome! I love the sleeves.
Post a Comment