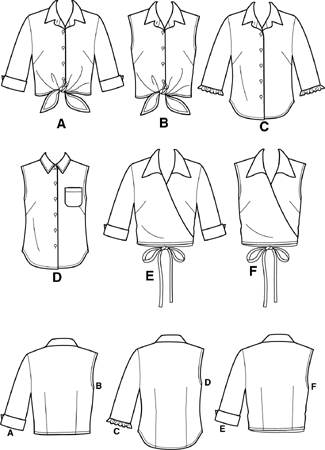
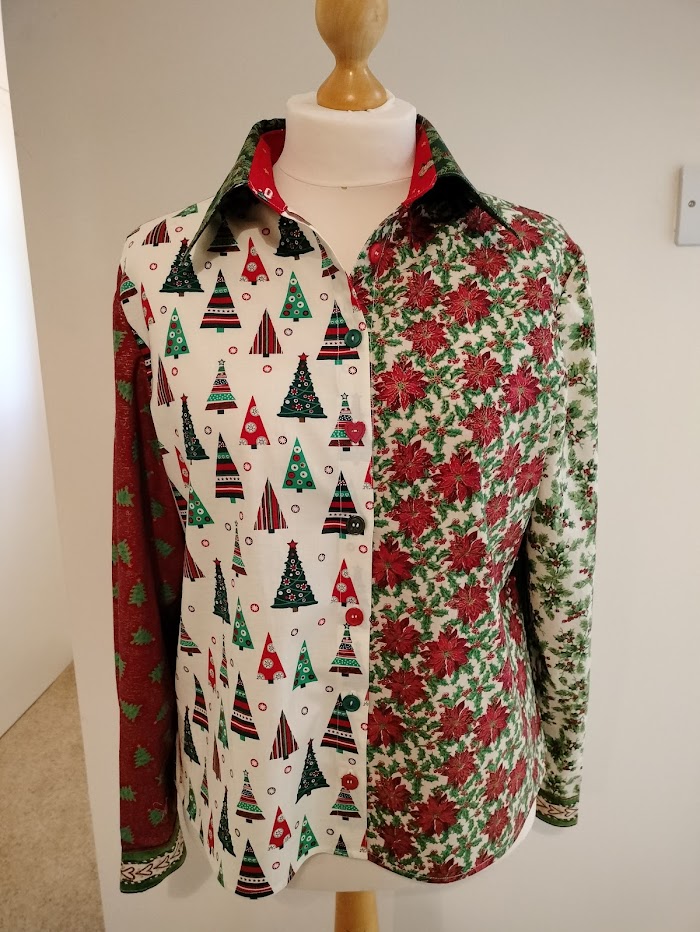
Cotton lawn blouse with pattern matching across the front placket and front patch pockets.
This will also be for my travel wardrobe, but pretty to wear at home afterwards too.
Adventures in garment construction. (Plus random thoughts, photos of interesting places and stuff I've made!)
Cotton lawn blouse with pattern matching across the front placket and front patch pockets.
This will also be for my travel wardrobe, but pretty to wear at home afterwards too.
Same pattern as the reindeer shirt but with slightly narrower cuffs, and as the buttons are smaller, more buttonholes!
The fabric was a thrifted remnant, a lovely soft cotton and a non directional print.
Unfortunately the dye has leaked in places when I pressed after using the water spray during construction. I think I'll let it soak in some hot water with salt added to see if I can even out the dye, as I quite like the effect where it is pale and dark red instead of red and white.
And if that doesn't work think about overdyeing it.
----------
Updated to add that I soaked the shirt in very hot salty water overnight - the water turned red so obviously a lot of dye came out. The next day I washed on cool in the washing machine and left to air dry - the colour is now even across the whole shirt.
I remember back in the early SWAP (Sewing With A Plan) they advised sewing a matching skirt and top from a print fabric as a core to the 11 piece collection. Now many years later there's something called a co-ord which is a matching top and bottom from the same fabric!
I got a lot of wear from the Blue Culottes and Blouse Co-ord Set I made in June, particularly when it was hot. So I decided to have a go at making some more. The best thing about a co-ord is that it's like a dress, wear the two pieces together and you have an instant outfit! But even better you can (theoretically) split the items and wear them separately.
In both sets I used the same patterns.
If you've followed my blog for any length of time, you know I like to sew multiple things with the same thread colour where possible. I really like to have the overlocking (serger) threads inside my garments all matching and to this end have 5 drawers of thread, much of it Coats Moon sorted by colour.
So whilst I had bright burgundy (Moon M0055) on the machines I hunted in the fabric boxes for other fabrics I could sew up.
I found a remnant of a lovely bright burgundy viscose (rayon) with a very slight crinkle texture and beautiful sheen. I had cut other things from it previously, so it was an odd shape and not much yardage. It looked like it would like to be a blouse.
I ironed the fabric and laid it on my cutting board, and decided to try Simplicity 9200 again only to find I couldn't quite get the front shoulder out of the fabric (big funny shaped thing had been cut out). I then decided to move the shoulder seam forwards. So took 1.5" off the front shoulder and added it onto the back shoulder (and left myself a note in the project tray*, so I didn't get confused putting the sleeve in).
Once I'd cut out the front and back, I was able to cut the sleeves single layer, but then realised I didn't have any sections large enough for 2 collars..... After a bit of pondering I cut two collar stands and then cut lots of pieces 2 1/2" wide and varying lengths, which I pieced together to get a strip about 3 times the length of the collar stand. I then seamed the ends, pressed in half, and gathered onto the collar stand as a frill.
(* I have two shallow plastic baskets, slightly larger than A4/letter paper. As I cut out I put the pieces into the basket along with any zips/buttons etc I might need. It stops me losing pieces in the jumble of the sewing room)
I lengthened the sleeves, added a bound slit and buttoned cuffs. I also put the buttonholes slightly closer together and used more buttons.
The pattern does not have you interface the front band, but I did as the fabric is so lightweight.
The fabric was quite tricky to handle. I pressed the fabric, then laid it out on a table with a lot of weights, carefully cutting the larger pieces with very sharp shears. For the smaller pieces I cut them out of interfacing first, then fused the interfacing onto the back of the fabric pieces once I'd made them as straight as I could. I then cut round the interfacing.
For an accurate collar I traced the stitching lines onto tissue which I placed on top of the piece when sewing.
I had a remnant of this fabric left from making something for Auntie J and there was just enough to cut out my favourite shirt pattern with long sleeves, cuffs, buttoned pockets and etc.
I wasn't able to even attempt pattern matching, but did try to have pleasant looking sections for the collar ends and pockets.
I made it just slightly oversized as its a viscose with a slight crinkle texture which I think would shrink up slightly after washing, and maybe not always need ironing. I did have to iron it to cut out, so we'll see how this one works out!
Pattern Information.
This is my current favourite shirt pattern. It is adapted from a shirtdress pattern which was in the March 2020 Prima magazine (UK women's magazine).
I have shortened the length to a shirt length with curved hem. I have added patch pockets from another Prima pattern, and pocket flaps from a big 5 pattern. I also make the cuffs deeper and have a continuous lapped placket instead of just a gap in the side seam.
This is my first try with the Love Notions Ballad Blouse
I made the size XL with Bishop sleeves.
Next time I would alter the yoke to better suit my high round back better but this version is definitely wearable.
I'm going to wear this tonight with black jeans and a jacket to attend a concert with my friend and then later with other things instead. I'm hoping it will prove a versatile piece.
---------------------------
Fabric sewn so far in 2025 - 13m, fabric purchased zero!
3m of teal jersey
2m of print/brown sweater knit
3m of animal print jersey
3m of brown poly knit
2m of pink cotton poplin
The Love Notions Rhapsody Blouse is a very popular pattern, and I picked it up recently on their Friday $5 special offer.
I printed out the size XL which matched my bust/high bust measurement. I used the layers feature to turn off all the other sizes, also turned off Letter and had the A4 page marking. When printing in A4 its not truly trimless, but not a lot needs removing on each page.
I made the view with 3/4 sleeves with cuff and kept the 'strings' on the neckline.
I used a very fine cotton lawn which the sewing machine didn't want to sew. I need to get some sharp/Microtex needles, but until then I used tissue paper and spray starch to tame it which improved thing a lot.
I struggled making the bias tape, but this was before I'd got going with the spray starch so I'll try to remember that for next time.
The instructions in the pattern are good and very thorough though I also watched videos on You Tube.
Other than working with the fabric, my only other issue was that the cuff didn't fit onto the sleeve as per the diagram. I thought that this was because the pattern pieces for XL didn't match up, however it turns out I was confusing the 3/4 length Bishop Sleeve with the 3/4 length sleeve, so my error. (The cuff prints out with the Front body piece, so is a bonus you don't need for the bishop sleeve).
I have a couple of queries on the style.
First of all I'm not a strings person and I don't know what to do with them when I wear this blouse - loose knot, flying free, twee bow? - so I think for future versions I'd skip that and have the view with the neat neck.
The other style query is that the shoulders are quite set in (more apparent on some of the tester blouses than others) and I'm not sure if this works with my shoulders, the shoulders feel too narrow and my shoulder is sitting in the top of the sleeve instead.
What do you think?
I was wearing one of my self sewn blouses. "That's a lovely blouse" says Sylvia, "Oh thank you!" I reply "I made it myself".
"Ah" says Sylvia "that reminds me I have a blouse in a similar style I cut out about 30 years ago...."
Long story about cutting out blouse, then broken sewing machine, eventually getting sewing machine fixed, couldn't find blouse bits etc. Anyway short version is I've brought the blouse home to sew up for her before Christmas!
Happily its all there
Already cut out - Front, back, sleeve, yokes, 2 part collar and cuffs - still with tissue pinned on
Also pattern envelope and instructions and the spare fabric, as well as matching buttons.
So it really is a kit for a blouse. All I needed to provide is some matching thread, some interfacing and then 'just' sew it up!
---------------------
A few months passed, I didn't really have any matching thread and procrastinated a bit, Sylvia found me a few spools of thread one of which worked perfectly.
The fabric turned out to be Viyella and frayed very badly with any handling so I was very careful when sewing up.
I threaded the overlocker in a neutral beige which was OK to stop fraying.
I spent the last few days carefully sewing it up, and am pleased and astonished to find it fits. No photo though of Sylvia wearing it.
Having had more of a think, Sylvia reckons she bought the fabric in 1982 when she couldn't find a cream bluse that she liked.
Sylvia came this evening and was delighted with the blouse, so a happy ending to the story!