
Sunday, 8 September 2013
Animal print Buff style scarf
Again a home sewn copy of a purchased item, this is an attempt to copy a Buff, which is a sort of tubular scarf which can be worn in many different ways.
 It is simply a tube of a size which fits snugly over your head and can be worn as a neck scarf, beany hat, hairband and various other ways. Very handy for travelling.

Friday, 6 September 2013
Leopard print shoe bag
Latest quick make is this leopard print shoe bag.
 The shoe bag is similar to the previous drawstring bag, except it is squarer and the drawstrings just go across the top (so it can't be carried rucksack style). It also has a line of stitching up the middle to separate the shoes from each other. This stitching doesn't go across the casing for the drawstring though.
I copied an M&S shoe bag my sweetheart had got with some shoes he bought as I thought it was a great idea and a bit nicer than plastic bags when travelling.
My walking shoes are in the bag in the photo and I think it'll be very practical as well as a whole lot more fun in leopard print!

I copied an M&S shoe bag my sweetheart had got with some shoes he bought as I thought it was a great idea and a bit nicer than plastic bags when travelling.
My walking shoes are in the bag in the photo and I think it'll be very practical as well as a whole lot more fun in leopard print!
Thursday, 5 September 2013
Purchased mini wardrobe
Perhaps cheating a bit but I decided to augment my work wardrobe with a 4 part set of black jacket, trousers, skirt and dress plus two blouses, a bag and some nice wooden hangers.

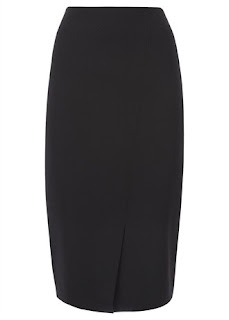


 I can't find the two blouses - one is white with embellished detailing, the other is a t shirt blouse style in ivory with an animal print.
I also bought some tights which suck you in, and have boots/shoes which I can wear to complete the outfits.
I shall then mix in my loud necklaces, bright blouses, boots, interesting scarves and etc to create more of a Ruthie style.


I also bought some tights which suck you in, and have boots/shoes which I can wear to complete the outfits.
I shall then mix in my loud necklaces, bright blouses, boots, interesting scarves and etc to create more of a Ruthie style.
Tuesday, 3 September 2013
Elastic strapped ballet flats
I need to wear an insert inside my shoes, and found the lack of a strap across the instep in ballet flats made them unwearable.
Then I saw some RTW ones with an elastic strap across, and decided today to do something similar to mine to make them more wearable.
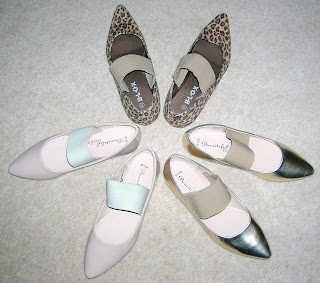 Here they are with beige elastic added to the shoe. I must admit it was quite fiddly to stitch on and doesn't look great if you look too closely, but with some brute force and a zipper foot I now have 3 wearable pairs of shoes which is fabulous.
I may also dye some plain white cotton socks with Dylon's Pebble Beige to wear with them, as this works quite well as a 'close to nude' colour for me.
 I have two black pairs and a red pair which will get black elastic and be worn with black socks, but not today as i have some other projects to complete first.
These look quite good with pants which come down over the foot which is how I plan to wear them.
The animal print ones in particularly look good with my tan wool pants, and since both of these have previously been hard to style this is great!
Then I saw some RTW ones with an elastic strap across, and decided today to do something similar to mine to make them more wearable.

I may also dye some plain white cotton socks with Dylon's Pebble Beige to wear with them, as this works quite well as a 'close to nude' colour for me.
These look quite good with pants which come down over the foot which is how I plan to wear them.
The animal print ones in particularly look good with my tan wool pants, and since both of these have previously been hard to style this is great!
Monday, 2 September 2013
Drawstring leopard print bag
Another quick, but useful project. I copied one of sweetheart's drawstring sportsbags to make a different version for myself. The fabric is cut from an unused shower curtain bought from a discount store. It's 100% polyester and frays rather, but is great for these sorts of bags. I am planning a shoe bags and a smaller drawstring bag as well.
 I really like how this came out. It is worth keeping an eye out for reduced shower curtains. The plain plastic ones I use as drop cloths when painting walls or as a table cover for other projects. And ones with an interesting print are good for laundry bags, shoe bags etc.

Wednesday, 28 August 2013
Culotte half slip
A slight detour from the navy boiled wool because I decided I wanted a soft cotton culotte half slip to wear under dresses when I don't want to wear hosiery.
I adapted an elastic waist Burda magazine pants pattern to get this.
 Seems comfortable, so will try it under a dress tomorrow.
--------------------------
The culotte slip worked very well so I made another identical one.
For those who'd like to see how I created the pattern, hopefully this picture will help.
 The elastic waist pants pattern has been folded to knee length, and the pieces cut out as one. The extra fabric making it more skirt like and avoiding a side seam. I've used the selvedge for the hem, so just sewed front and back leg seams together, then crotch seams together, made an elastic casing, inserted elastic, added a back tag - done!
I adapted an elastic waist Burda magazine pants pattern to get this.

--------------------------
The culotte slip worked very well so I made another identical one.
For those who'd like to see how I created the pattern, hopefully this picture will help.

Tuesday, 27 August 2013
Boiled wool jacket - cut out at least
I finally got brave and cut into one of my pieces of boiled wool.
 I bought this on a stall in Preston market about 2 years ago with YorkshireLass, so as well as being the least expensive boiled wool in my stash it is also the newest.
This is the jacket part of my 6-piece-Autumn-Collection, though it may have more than 6 pieces in it.

 I'm making view B without the belt. When we fitted it we adjusted it so the front overlaps and can have buttons/buttonholes.

 I only bought 1.5 mentres so there wasn't enough for a whole skirt, but I
did manage to squeeze out the outer yoke and centre front and back
panels of a shortened view F.
I only bought 1.5 mentres so there wasn't enough for a whole skirt, but I
did manage to squeeze out the outer yoke and centre front and back
panels of a shortened view F.
There isn't actually a centre back panel but I created one by cutting down through the back dart and adding on a seam allowance.
The rest of the skirt will later be cut from some dark navy tweed flecked with a lighter navy and white. This same fabric is planned to also be another jacket from the same pattern and then the skirt can then be worn with either jacket.
There may be extra tweed fabric left, but I suspect it is too nubbly for trousers, so a plain skirt, a waistcoat or even a sleeveless dress?
Anyway for now I am going to be working on the jacket though I am in work all day, have an evening haircut booked tomorrow etc etc so we shall have to see how much I manage to do in the evenings.

This is the jacket part of my 6-piece-Autumn-Collection, though it may have more than 6 pieces in it.
There isn't actually a centre back panel but I created one by cutting down through the back dart and adding on a seam allowance.
The rest of the skirt will later be cut from some dark navy tweed flecked with a lighter navy and white. This same fabric is planned to also be another jacket from the same pattern and then the skirt can then be worn with either jacket.
There may be extra tweed fabric left, but I suspect it is too nubbly for trousers, so a plain skirt, a waistcoat or even a sleeveless dress?
Anyway for now I am going to be working on the jacket though I am in work all day, have an evening haircut booked tomorrow etc etc so we shall have to see how much I manage to do in the evenings.
Monday, 26 August 2013
Lace tee
The same pattern (Santa monica Tee) as the little striped tee from a couple of posts ago, this is a lace version.
.JPG) I've used the scalloped edge as the hem, added a neckband and a little self fabric tag to identify the back.
I've used the scalloped edge as the hem, added a neckband and a little self fabric tag to identify the back.
 The soft green background to the knit was very hard to match, so I used this taupe coloured almost invisible specialist Guttermann thread in the overlocker. It was tricky to thread but looks wonderful.


.JPG)


Dark Denim finished
These dark denim trousers (pants), were in the unfinished projects box, I think because they didn't fit at the time.
I've since got a bit fatter so they fit quite well now.
All I did was sort out the bottom of the invisible zipper in the back, and hand sew the facing to the zipper tape and all the seams and darts.
.JPG) They are a dark indigo stretch denim with no pockets or topstitching, but should sit nicely under tees without added bulk round the waist and tummy area.
They are a dark indigo stretch denim with no pockets or topstitching, but should sit nicely under tees without added bulk round the waist and tummy area.
They look great with yesterday's tee.

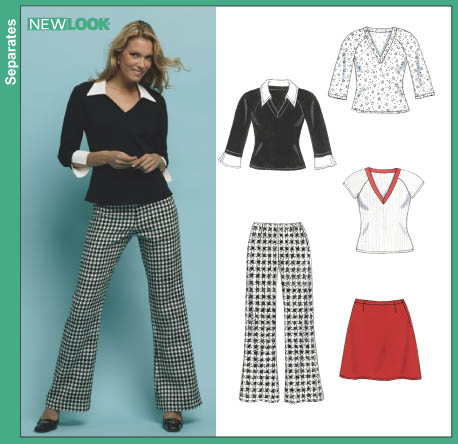
 I used New Look 6415, taking deeper darts and moving the zipper to the back. The were originally constructed in April 2008.
I also mended the Flag Pocket jeans, as the seam beneath the invisible zipper had come apart.
 So I now have two more pairs of jeans like trousers back in circulation!
I've since got a bit fatter so they fit quite well now.
All I did was sort out the bottom of the invisible zipper in the back, and hand sew the facing to the zipper tape and all the seams and darts.
.JPG)
They look great with yesterday's tee.

I also mended the Flag Pocket jeans, as the seam beneath the invisible zipper had come apart.

Sunday, 25 August 2013
Navy stripe Textile Studio Santa Monica tee
Here's a little top, cut out and sewn up today.
 The top is sewn from the Santa Monica tee pattern (Textile Studio 1211).
I used the short sleeves cut from a plain navy scrap whilst the body is made from leftovers from another top.
 I've added a neckband, and used a size L, lengthened by one inch in the body and half an inch on the short sleeve. I also flared out the body from the waist down by about a quarter of an inch. I also added a mock label at the back neck so I know which is the back. We had trouble when we muslined this and I couldn't tell the front from the back.
It is interesting that the stripes/contrast/neckband all work together to give a sporty look rather than the dressier look in the pattern photos.
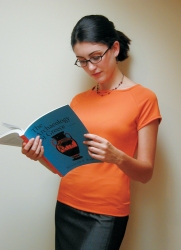 I am rather pleased with it and can see it being worn a lot with jeans at the weekend.
Next up, the same pattern, only in a light green/white/pink floral lace. Should look very different and hopefully dry quickly making it an option for travel.

I used the short sleeves cut from a plain navy scrap whilst the body is made from leftovers from another top.
It is interesting that the stripes/contrast/neckband all work together to give a sporty look rather than the dressier look in the pattern photos.
Next up, the same pattern, only in a light green/white/pink floral lace. Should look very different and hopefully dry quickly making it an option for travel.
T shirt alterations completed
The four side panelled tees
 And the the four with a changed hemline
 I must admit I am NOT super happy with these tee alterations.
The panelled tees worked out OK, but the pale pink tee is quite bobbly and the white tee has a stain which won't come out. So I think those are going to be 'painting' tees, ie tops for dirty/messy jobs like painting, gardening, car washing etc.
The large tees are as you can see kinda boxy, so even with the shaped hem are a little wide across the shoulders and a little snug on the high hip, so will still need to be worn tucked in, as these are new though they are as yet unstained.


The panelled tees worked out OK, but the pale pink tee is quite bobbly and the white tee has a stain which won't come out. So I think those are going to be 'painting' tees, ie tops for dirty/messy jobs like painting, gardening, car washing etc.
The large tees are as you can see kinda boxy, so even with the shaped hem are a little wide across the shoulders and a little snug on the high hip, so will still need to be worn tucked in, as these are new though they are as yet unstained.
Thursday, 22 August 2013
Purchased T Shirt alterations
When I travel I like to use quick drying travel garments. My stash doesn't contain suitable fabric so I have various pieces I have purchased.
I realised my quick drying tees look OK when under a shirt, but are clarly too tight when I take the shirt off when I warm up. This has resulted in some less than flattering holiday photos, so I decided to tackle the problem.
I have quite a few of the tees which are too tight through the tummy and hips, and some of them I even have two of the same size, style and colour, so decided to cut panels from one to widen the other. I thought this might be of interest to others so am documenting it here.
You need
 Cut the side seams off the t shirt you will use for the main body, then layer up the shirts as follows
On the bottom lay the well fitting t shirt, either folded in half, or since mine has a centre back seam, laid flat and use the seam to guide you.
Fold the other two tees in half and make sure the sides/hems are level.
Next lay on the folded t shirt you will cut the panels from and line it up with the side seams of the larger tee.
.JPG) Finally lay the folded main body tee on top but lining up with the centre back of the well fitting tee.
Finally lay the folded main body tee on top but lining up with the centre back of the well fitting tee.
.JPG) Mark the side of the main tee on top of the panels tee, and remove the main tee. Add 2 x seam allowances. Cut along this line.
Mark the side of the main tee on top of the panels tee, and remove the main tee. Add 2 x seam allowances. Cut along this line.
.JPG)
.JPG) Now sew the panels to your tee with the sewing machine, you can then either overlock/serge this or coverhem depending on the machines you have and the finish you want.
Now sew the panels to your tee with the sewing machine, you can then either overlock/serge this or coverhem depending on the machines you have and the finish you want.
.JPG) Yay!!! You now have a better fitting tee.
Yay!!! You now have a better fitting tee.
 (Note: I'm presuming the original tee fits you in the shoulders but is too tight through the body. This is a particularly good alteration for pear shapes like me, as you can flare out the side panels to add whatever extra you need.)
I'll look later at how to add panels if you don't have another t shirt to use, but do have some scraps of suitable yardage. It can be a fabulously slimming look.
I realised my quick drying tees look OK when under a shirt, but are clarly too tight when I take the shirt off when I warm up. This has resulted in some less than flattering holiday photos, so I decided to tackle the problem.
I have quite a few of the tees which are too tight through the tummy and hips, and some of them I even have two of the same size, style and colour, so decided to cut panels from one to widen the other. I thought this might be of interest to others so am documenting it here.
You need
- One t shirt which fits you properly, this is going to act as a guide for how much to add.
- One too tight t shirt to be the main body, so pick the one in better condition.
- One too tight t shirt to use for panels, so pick the one with the pilling or stain.

On the bottom lay the well fitting t shirt, either folded in half, or since mine has a centre back seam, laid flat and use the seam to guide you.
Fold the other two tees in half and make sure the sides/hems are level.
Next lay on the folded t shirt you will cut the panels from and line it up with the side seams of the larger tee.
.JPG)
.JPG)
.JPG)
.JPG)
.JPG)

I'll look later at how to add panels if you don't have another t shirt to use, but do have some scraps of suitable yardage. It can be a fabulously slimming look.
Tuesday, 13 August 2013
Sailing boat shopping bag
I just finished off this sailing boat themed shopping bag, which is a hostess gift for a lady who loves sailing boats. I hope she likes it.
 It is based on an idea from the book "Freehand Machine Embroidery" by Poppy Treffry which was featured in the August Prima Magazine.
I adapted the design to suit my fabric and style, but I think it worked out OK.

 I must admit I have not followed the instructions, instead making the bag from a piece of fabric 100cm by 50cm and applying the motif where I thought appropriate. I've also gone for a dark bag with a pale boat rather than the other way around due to the fabric I had.
I constructed my bag flat. I measured some existing purchased shopping bags and drew elements I liked from each checking the motif would fit OK. I then measured my fabric and worked out the 1m of 150cm wide would make 3 bags. I cut out the bag and overlocked all the edges first.
Then I cut the boat elements from scrap fabric and sewed on with ivory thread. Then I sewed the top hem, attached the handles whilst the bag was flat and gave it all a press.
Only after this did I sew up the side seams, and square off the bottom.
To give support in the bottom I cut a piece from a plastic food preparation mat I bought in the supermarket. It was a set of four in different colours, but the dark blue one seemed to work OK so I have not covered it in lining as planned, just put it loose in the bottom.
The boat motif would make a nice cushion design also, and if you don't like the raw edges you can always add a small seam allowance and tuck it under when sewing.

I adapted the design to suit my fabric and style, but I think it worked out OK.


I constructed my bag flat. I measured some existing purchased shopping bags and drew elements I liked from each checking the motif would fit OK. I then measured my fabric and worked out the 1m of 150cm wide would make 3 bags. I cut out the bag and overlocked all the edges first.
Then I cut the boat elements from scrap fabric and sewed on with ivory thread. Then I sewed the top hem, attached the handles whilst the bag was flat and gave it all a press.
Only after this did I sew up the side seams, and square off the bottom.
To give support in the bottom I cut a piece from a plastic food preparation mat I bought in the supermarket. It was a set of four in different colours, but the dark blue one seemed to work OK so I have not covered it in lining as planned, just put it loose in the bottom.
The boat motif would make a nice cushion design also, and if you don't like the raw edges you can always add a small seam allowance and tuck it under when sewing.
Saturday, 10 August 2013
Abstract seascapes
I fancied some blue pictures in my living room, but am no artist, so decided to use three lots of leftover emulsion and a tester pot in a darker blue to create some abstract seascapes. Here are the finished pictures.
More Sea
.JPG) More Sky
More Sky
.JPG) Wide Sky
Wide Sky
.JPG) All 3 in one room might be overkill! Maybe some will go to the next Craft Fayre.
All 3 in one room might be overkill! Maybe some will go to the next Craft Fayre.
More Sea
.JPG)
.JPG)
.JPG)
Red ponte dress rescued
I made up this red ponte dress quite a while ago (apparently March 2012!) and it was too big. It sat in a pile for quite a long time until I took with me it a few weekends ago when I went to see Yorkshire Lass.
 We've taken the centre back seam in from just below the waist right through to the top of the neck by an inch and three quarters each side - ie by 3 and a half inches. This does make the back narrower than the front, but it was the simplest way to get it to sort of fit.

 The pattern is new look 6751. If I made this again maybe I would go down a size. It may be the ponte fabric or just the pattern, I am not sure since I've only made this dress the once. It can apparently be made from knits or wovens and should have a zip down the back which I have omitted.
Anyway it is now wearable rather than a wadder, and works well with an existing purchased jacket which is white with red and black print.
I am making a concerted effort to deal with the wadders by fixing them, donating them or recutting them into something else. This definitely helps the sewing room feel less cluttered which is good.


Anyway it is now wearable rather than a wadder, and works well with an existing purchased jacket which is white with red and black print.
I am making a concerted effort to deal with the wadders by fixing them, donating them or recutting them into something else. This definitely helps the sewing room feel less cluttered which is good.
Subscribe to:
Posts (Atom)